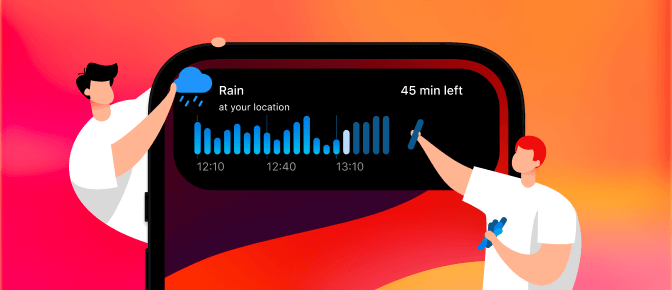
RainViewer widgets deliver data at a glance: Unlock your phone, then look at the screen.
With two types of widgets available, RainViewer can show you a recent radar map as well as near-term temperatures and conditions.
Want more info? Tap on the widget to open the RainViewer app.
If you frequently check the weather, we suggest you add both a weather map widget and forecast widget to your phone. The combination of widgets gives you a good overview of current and expected weather conditions. The steps below should help you get started.
Install the RainViewer app
Before you can add RainViewer widgets to your phone, you’ll first need to have downloaded and installed the RainViewer app to your device. (Install the Android version from either the Google Play or the Huawei AppGallery, or the iOS version from the App Store.) Go ahead and open the app, set favorite locations, and customize any settings you like.
After you’ve installed and explored the app a bit, you may add and configure RainViewer widgets.

How to add RainViewer widgets on Android
Note: The following instructions were written for Android version 11 on a Pixel phone. The process may vary, depending on your device’s Android version and/or launcher.
On your Android home screen, tap and hold on the RainViewer app. Wait for the menu to display.
Tap Widgets.
Review the RainViewer widgets available. Swipe left and/or right for all options. The options include:
- Three precipitation and forecast widgets, and
- One weather radar map widget.
Tap and hold on the widget you want to use, the drag it to a home screen.
(Optional) Adjust any widget display settings as desired.
Next, tap ADD TO HOME SCREEN.
(Optional) In some cases, you may be able to adjust the size of your selected RainViewer widget. To do this, tap and hold on the widget. Release when circles display on sides of the widget. Tap-and-drag a circle to adjust the size of a side of the widget.

How to add RainViewer widgets on an iPhone
On your iPhone home screen, tap and hold on an empty portion of the screen. Wait until the apps jiggle.
Tap the + button (in the upper left corner).
Type “RainViewer” in the search box. You may only need to type a few letters for the system to find the correct app. Tap on the RainViewer result.
Review and select the RainViewer widget to add. As of February 2021, you may choose from: Two precipitation and forecast widgets (one small square, one medium rectangle, and Three weather radar maps (one small square, one medium rectangle, and one large square)
On the screen with the widget you want to add, tap + Add Widget (at the bottom of the screen). This places the widget on your Home Screen.

(Optional) To reposition the widget, tap-and-drag it to your desired home screen and location.
Tap Done (in the upper right corner) when the widget is positioned on the screen.
To modify the settings for a RainViewer widget, tap-and-hold on an installed widget until a menu appears. You may then choose to:
- Edit Widget,
- Edit Home Screen, or
- Remove Widget.

For example, if you select Edit Widget on a RainViewer weather radar map, you may adjust things such as the map type, zoom level, color scheme, and more.
The RainViewer widgets update in the background periodically. In some cases, you may need to adjust the app location permissions to allow RainViewer to properly pull data. (Go to Settings > RainViewer and then adjust Location > to either While Using the App or Widgets or Always. Additionally, you will likely want to enable Background App Refresh.
How do you use RainViewer widgets?
Let us know which RainViewer widgets you use on your phone! Share a screenshot of your RainViewer widgets along with the hashtag #RainViewer (or mention us @RainViewer) on Twitter. We’d love to see your setup!


