
Setting up a home weather station can be an exciting and rewarding experience. Whether you’re a weather enthusiast, a gardener, or someone who simply enjoys monitoring the local climate, having accurate readings is essential. However, improper placement of your weather station can distort data, making it unreliable. In this guide, we’ll explore the best practices for siting your personal weather station to ensure accurate and consistent weather readings.
Why Proper Siting Matters
Before diving into the specifics of placement, it’s crucial to understand why siting matters. Weather stations collect data on temperature, humidity, wind speed, wind direction, precipitation, and atmospheric pressure. If placed incorrectly, buildings, trees, and artificial surfaces can distort these readings. For instance:
- Temperature sensors near concrete or asphalt will register higher-than-actual temperatures due to heat retention.
- Wind sensors near obstacles may not capture true wind speeds or directions.
- Rain gauges placed under trees or near buildings can underestimate precipitation amounts.
Want to verify your weather station’s accuracy? Compare your real-time readings with Rain Viewer’s hyper-local radar data. Follow these best practices to ensure precision and track how your data aligns with regional forecasts.
Installing Your Weather Station Components
A personal weather station typically includes several key instruments: a thermometer, hygrometer, anemometer, wind vane, rain gauge, and barometer. Each of these sensors requires specific placement to maximize accuracy.
Wind Speed and Direction Sensors (Anemometer and Wind Vane)
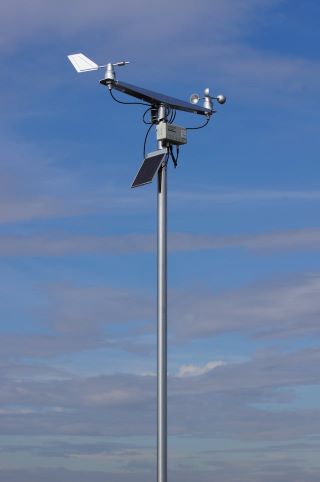
Source: Photo by Victor Suciu
Place wind sensors where they can capture unobstructed airflow. Poor placement can lead to inaccurate wind speed and direction readings.
- Height. The standard height for anemometers is 33 feet (10 meters) above ground. However, for home installations, placing the sensor on a roof or a tall mast is a good compromise.
- Distance from obstacles. Place the sensor at least 10 feet (3 meters) above the nearest obstruction (such as trees or buildings) to minimize wind interference.
- Mounting. A tripod or mast with a sturdy mounting system is recommended to keep the anemometer stable.
- Calibration. Ensure the wind vane is properly aligned north to ensure accurate wind direction readings.
Temperature and Humidity Sensors
The thermometer and hygrometer measure air temperature and humidity levels, respectively. These sensors are highly sensitive to their surroundings, making proper placement essential.
- Height. Position the sensor 4 to 6 feet (1.2 to 1.8 meters) above the ground.
- Distance from buildings and surfaces. Place the sensor at least 50 feet (15 meters) away from concrete, asphalt, or large heat-retaining surfaces to prevent artificial temperature inflation.
- Shading. The sensor should be in a properly ventilated radiation shield to protect it from direct sunlight while allowing airflow.
- Ground cover. Install the sensor over natural grass or soil, as these surfaces best represent ambient air temperatures.
- Obstructions. Avoid placing the sensor too close to buildings, trees, or other obstructions that may create microclimates.
Rain Gauge
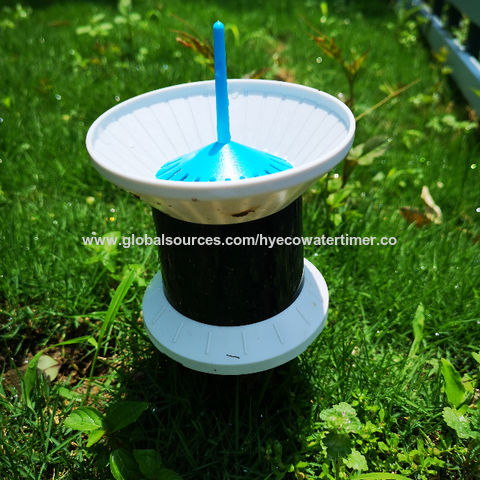
Rain gauges must be positioned to accurately capture precipitation without interference from obstacles like roofs or trees.
- Open area. Install the gauge in an open location, at least twice the distance away from the height of the nearest obstacle. E.g., if a tree is 10 feet tall, place the gauge at least 20 feet away.
- Level ground. Place the gauge on a level surface to prevent tilt, which can make rainfall measurement inaccurate.
- Height. The gauge should be 2 to 5 feet (0.6 to 1.5 meters) above the ground to avoid splashback from the ground.
- Stability. Secure the gauge firmly to prevent movement due to wind or animal interference.
Barometer
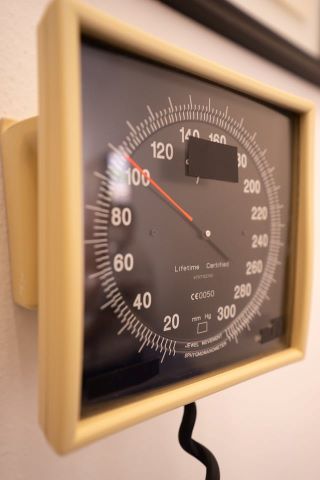
Source: Photo by Los Muertos Crew
Barometric pressure sensors (barometers) measure atmospheric pressure, and their placement is relatively straightforward.
- Indoor location. Many weather stations include built-in barometers that function indoors. Place the unit in a consistent environment away from air vents, fans, or direct sunlight.
- Avoid airtight spaces. Ensure the sensor has access to free-moving air, not enclosed within a sealed space.
Regular Maintenance of a Personal Weather Station for Accurate Weather Data
Proper siting is just the first step. For precise weather station data, regular maintenance is necessary:
- Check for debris in the rain gauge and clean it periodically.
- Ensure the temperature sensor is clean and not obstructed by dirt or spider webs.
- Inspect the anemometer for obstructions or mechanical wear that could affect wind readings.
- Calibrate sensors periodically and compare your readings with Rain Viewer’s radar to fine-tune accuracy. If your station records sudden pressure drops, check RainViewer’s storm maps: this could indicate an incoming system.
How to Install a Weather Station: Conclusion
Siting your home weather station correctly is crucial for obtaining reliable and accurate weather data. By positioning each sensor properly, you’ll capture more precise local weather data. Want to see how your readings compare to regional radar? Use Rain Viewer to track live weather patterns, storm developments, and precipitation trends in real time!